Showing posts with label wreath. Show all posts

Sunday, December 30, 2012

A New Addition: The Brady Wreath

Hope everyone had a very Merry Christmas - or Happy Holidays - whichever greeting you prefer.

Ours was wonderful - it's the first year that the kids have really been excited about Santa and all of the Christmas-related festivities.  I'll try to post more on that later.

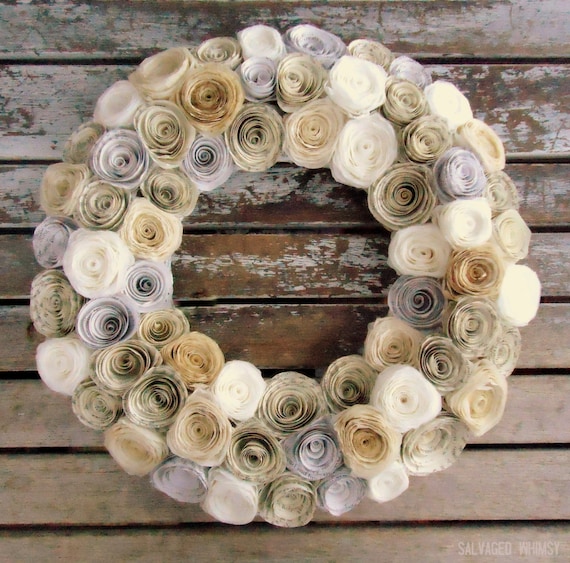
A couple weeks ago, my husband asked me to make a wreath for a coworker of his - it was actually for a family member of a coworker - so the only details I was given was to make it in "white, creams, and tans."

Any requests for additional specifications or details were fruitless.

Typically, this would not work for me.  Typically, I need very specific instructions. Typically, I'm not dealing with 2 men working with more detail-oriented people who understand why "white, creams, and tans" are not true details.

It's always a little worrisome when you put a ton of time and effort into creating something without knowing what the end result might be...


...but I had already made 4 other wreaths that week...one of which took over 1000 (dyed!) coffee filters....and I just wanted to get it done.

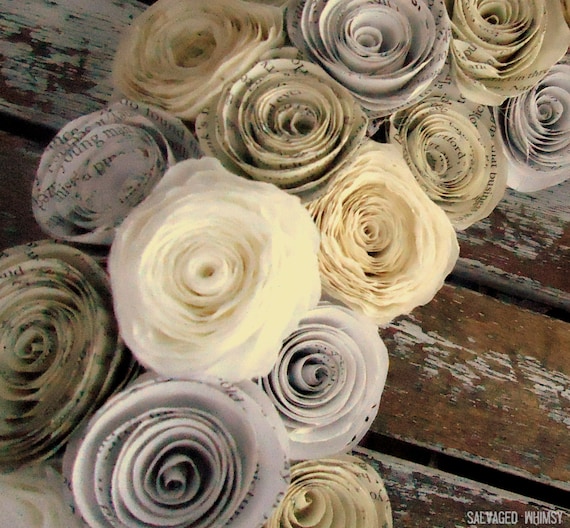
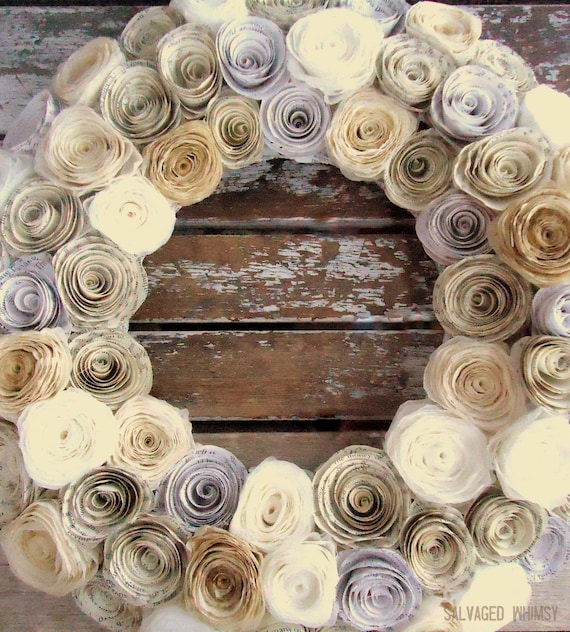
I'd been thinking about doing a wreath similar to this for a while, and I was happy with how it turned out...

I used several shades of book pages, white coffee filters, and coffee-dyed filters.


It's named "The Brady Wreath"  - after the person who ordered it.

(SHAMELESS PLUG - see, if you order a custom wreath from me, it may be named after you...it's not everyday you get a wreath named in your honor!)


What does "white, creams and tans" mean to you?  

uhhhhhhhh....

....my thoughts, exactly.

(Oh, and of course, I never found out if his coworker liked the wreath or not because my husband "hasn't had a chance" to talk to him. MEN.)

take care -


Follow Me on Pinterest

Monday, April 9, 2012

First Guest Post Ever - THE BOLD ABODE

I was thrilled when Gwen from The Bold Abode asked me to guest post on her blog...so I mustered up the courage to ask her if she'd consider being the FIRST GUEST POSTER EVER at Salvaged Whimsy.

Now before you run off and get sucked in by her wonderfully amusing and inspiring blog, stick around here and take a moment to enjoy her post here (did I mention that it's the first time I've had someone guest post here?)

***

Holla, holla, yall!
I’m Gwen
from
Bold-Abode-Button-rectangle


I’m so excited to be over here at Salvaged Whimsy I can’t stand it… I’m ‘bout ta burst with excitement!

And I’m in LOVE with Erin..and it has Nothing to do with her MAD coffee filter wreath skills…

nope…absolutely nothing…
Well, maybe a just a smidgen...
Anyway, I am so honored to Erin’s first guest post…
She is one BOLD girl for having me over here!!!
Sooo… are yall good gift givers?


I mean…it’s an art, is it not? And somehow I missed that class along the way… Bum-MER...

And when it’s your Mother-in-laws birthday, it’s really nice to have great knowledge in the art of gift giving… But alas… not only do I lack in skills, I totally FORGOT her birthday.

Which is NOT funny.


Even less funny is that it’s the SAME DAY AS MY HUSBANDS!!!!

Bad Daughter-in-law…bad, bad, bad.

So, about three weeks later, I made this…for myself…

Apron (2)

I found this beautiful decoator’s fabric at a thrift store…shining in lustrous brilliance and reaching for me from the back corner of the room…

Apron

It looked a little bare, so I added the little ruffle detail across the bottom.

Apron sash

And I gots all fancy-schmancy and used a decorative stich on the hem and the waitstband…

Apron Waistband

And I got all ready to put this girl ta work…

BUT that little voice in my head, said…{pssst…better to give than to receive…}

What? Go Away Voice…

{PSSST….YO… Go mail that to your sweet MIL. NOW}


And so… and so, I did. I wrapped it all up and sent it on it’s way. And I think she liked it. At least, I do hope she did!

Zach Braff and Natalie Portman in a bath tub

I did… hahaha...

Thanks so much, Erin for having me! You are so sweet, girl!!!

I hope yall will pop over and see my new blog! I just moved to Wordpress and I couldn’t be more excited… and while you are there, I’d love to connect with you… you can find me here...


facebook
twitter
The Bold Abode
The Bold AbodeThe Bold Abode


Today just might be the day.
But, you'll never know if you don't get out there and

TheBoldAbode.com


***

Now, wasn't that fun?

I have it on good authority that Gwen has an absolutely fan-tabulous giveaway going on at her blog right now...
.
...so scurry on over there and enter to win your very own Salvaged Whimsy "Shades of The Bold Abode" Wreath.

But wait! Before you go, leave a comment here - it gives you an extra chance to with the wreath.
Thanks again to Gwen.


Sharing Gwen's beautiful apron at these linky parties:

MONDAY:

Take Care-
 

Thursday, March 15, 2012

Pastel Spring Wreath

A couple weeks ago, I took a little break from my big wedding order (which is FINALLY done, yay!!) to make something a little more colorful...using some of the pretty coffee filters I dyed when I made my tutorial a couple weeks ago.

Here's my tutorial on how to make rolled paper flowers

Here's another tutorial I created showing how I make wreaths from rolled paper flowers.


Had to share this one of it sitting on my beautiful, new floors.  The HIDEOUS blue carpet is almost GONE. (Except for the bedrooms....but we won't talk about that right now)

I had this listed on my Etsy shop, but it sold last week...

I have another order for the shop I work with, but I hope to have some other spring-inspired wreaths available within a couple weeks.

Linking up to these parties:
MONDAY:
Thrifty Decor Chick (1st Monday of Each Month)
TUESDAY: 
Kammy's Korner (Trash to Treasure)
WEDNESDAY:
THURSDAY:
FRIDAY:
Miss Mustard Seed (Furniture Only)
SATURDAY:


take care -
 

Follow Me on Pinterest

Saturday, February 18, 2012

Stunning Paper Rose Wreath Template

Handmade Paper Flower Wreath
Isn't this paper flower wreath by Ellinee stunning?  If I didn't have 15.5 (seriously) other wreaths to make right now, I'd SO be giving this one a try.

Even more fantastic...they give you a FREE template to print to make the flowers (as well as free templates for some of their other gorgeous items as well).  AMAZING.  Oh, wait, there's more!  Ellinee also gives a photo tutorial to show how to construct this dreamy-confection-for-the-eyes.
I don't know about you, but the wonderful-ness of this rivals Christmas morning for me!

If you decide to give this one a try, please, please, please let me know how it goes...I'm desperate to find out if this is really as amazing as it looks!  (I imagine it's quite time consuming, so you might consider grabbing a couple of your kids, friends, people off the street, etc. to help?)

Remember when my dreams of crafting glory were crushed by Martha...I  hope that this doesn't also end in a frustrated paper-folding melt-down.

Elegant Paper Rose

If I have a moment (you know, after the 15.5 wreaths...I'm writing this post at 6am on a Saturday...and my 2 toddlers are both still sleeping...I must have lost my freakin' mind!), I'm planning to do a little partying...


MONDAY:
TUESDAY: 
Domestically Speaking (Paint Projects)
Faded Charm (White Projects)
THURSDAY:


(I didn't receive anything for this post, like all of the blogs and sites I mention on Salvaged Whimsy, it's just something fabulous that I thought you might find to be fabulous too.)

Back to bed for me....hopefully....unless Emme decides to be an early-bird again this morning.

Have a beautiful weekend.

take care -
 
 
Follow Me on Pinterest

Monday, February 13, 2012

Tutorial: Dying Coffee Filters


Dying coffee filters is so easy, you're going to wonder why you waited for a tutorial to try and do this.

What you'll need:
* 1-2 packages (200-300 filters) of 8-12 cup coffee filters 
*large bowl
*water
*dye of choice - coffee, food coloring, craft paint, etc
*2 large cookie sheets
*oven (or lots of time)
* rubber gloves (optional)

If you are planning to make a 9-10" wreath, you'll need to dye around 200-300 coffee filters.  I buy them at Aldi's - they are $.99 for 200 filters, which is the least expensive place I've found.  A dollar store might also be a good place to look.

Before anything else - get out your cookie sheets and preheat your oven to 200-250 degrees. (Please use your own discretion here - I do mine at 245, not sure why I chose that temperature. I'm in the kitchen the entire time the filters are in the oven.  Please don't blame me if you burn your house down.)

When I made the coffee filters for my pink wreath a couple weeks ago, I didn't have any food coloring, so instead I used something that always seems to dye my fingers (and anything else it touches) - a packet of single-serve sugar-free juice mix...

This is the Cranberry flavor from Kroger...yes, it's caffeinated and actually, pretty tasty.  I used my last packet  on this tutorial, so I apologize if I'm not my usual perky self (ha, right!)

*If using craft paint, use as little paint possible to get your desired color, and mix it with a lot of water (4-6 cups) - the more watery the mixture, the better, if trying to achieve the stained look (and not painted).  
**If you're dying with coffee - make about 6-8 cups of coffee and pour 3-4 cups into a bowl, leaving some to use on later batches. You can use regular or decaffeinated.  I water it down some to cool it off before dipping my filters.

The amount you'll use depends on the shade of pink that you'd like...but it's better to go lighter, as you can always darken the color once the filters dry.
I fill a large butter container half full with water (temperature doesn't seem to matter) and sprinkle in a tiny amount of the juice mix or food coloring.  Make sure to mix together well to prevent blotches. Using diluted craft paint gives a more saturated color, but they are hard to keep from getting blotchy, if that matters to you.

 
Take a chunk of coffee filters

and divide them into smaller sections of 10-20 filters as you put them in the dye.

Once you have 50 or so filters,

push the filters down into the dye. (This is when you may want to use the "optional" rubber gloves)

Once all the coffee filters are wet

wring them out, making sure to check that they all are dyed. (Sometimes, the dye doesn't reach the middle of the "clump"...so you have to separate them out and re-dip as needed)

They don't need to soak for any amount of time before you remove them from the dye, they soak up the color pretty quickly. Soaking them for longer amounts of time doesn't seem to change the color at all.

Coffee filters are pretty durable, so don't be afraid to wring them out like you would a washcloth. The more dry they are now, means less time in the oven.

Then flatten them out and spread out on a cookie sheet in stacks of 5-10 filters.

And stick them in the oven - I do 2 trays at a time and 20 minutes usually is enough time.
If, after that time, some are still damp, you can either let them air dry the rest of the way, or put them back in the oven for a couple more minutes.
 (Sometimes the filteres on the top and bottom of the piles get discolored...I've thought about covering them with foil to prevent  this, but haven't tried it yet.)

I use different amounts of dye to get different shades.  If they aren't getting as dark as you'd like with any of the dying methods, you can re-dip them after they've dried and put them back in the oven to dry again.

 
These are all different shades made from just adding more of the juice mix or food coloring.  Also, if you are using the dyed filters to make flowers, remember that once the filters are rolled together, the color will look darker than the color of filter on its own.

Some other colors I've made using food coloring.

If you haven't seen the wreaths I've made using colored filters - here are a couple examples:
Using method shown above.

Using coffee-dyed filters

Made using watered-down black craft paint.

Purple Pink Coffee Filter Rolled Flower Wreath
Using diluted craft paint.

Please let me know if you have any questions.

In the next couple days, I'll be posting on how I make the paper flowers that I use for my wreaths.

Sharing this tutorial at some of these parties:

MONDAY:

TUESDAY: 
Domestically Speaking (Paint Projects)
Faded Charm (White Projects)
THURSDAY:

take care -
 

Follow Me on Pinterest
Related Posts Plugin for WordPress, Blogger...